Showing posts with label Studio. Show all posts

Monday, April 15, 2013

Studio Tour

Nina Marie is hosting a link party for everyone to share their studio or sewing spaces, and since I love peeking at everyone else's photos, I figured it's only fair to share my own.  I've done several different posts about the evolution of the new studio, from February of 2012 when we first bought the house up through January of 2013 when everything was finally, finally, finally done.  But I thought it would be fun to show the whole process consolidated in one post, at least as much as I have photos for, from start to finish.  So here we go!

The house as it looked when we bought it.
 The back yard slopes so the basement studio has at least a little natural light.  I don't have a picture of the back from the outside at the moment.
Hubby inspecting the floor drain before we committed to buying the house.
 I think this yellow was meant to be cheery but it was really just icky and dingy, IMHO.
A couple plywood shelving units were left behind.
I appropriated the larger one, the small one
went to the workshop.

The fireplace is not functional (yet).  But I have hopes.

Transforming...

Wow that's white!
 At this point I had some misgivings. Maybe it's too much white? I'm starting to paint the shelves here.

 I couldn't wait to unroll my old oriental rug as soon as the paint was dry. The cabinet off to the right was something the owners left upstairs that we re-purposed.  The little rolling cart houses my bead collection.

 Here I've positioned the two pieces of furniture from the old house to act as room-dividers, and to keep everything handy.  You can see the old shelves, painted white. I painted plywood light blue and attached it to the back so things couldn't fall off, and so there would be something besides white in sight.  If you want to see the old studio/dining room/parrot habitat,  it's here.  

Almost...


Here I'm starting to assemble my old drafting table, that had been in the attic for 20 years, due to the space shortage.

Sunshine! 

Fully functional! 
 We moved into the house in June, and by mid-July or so I was able to actually start working in the space.  I thought I would need to move furniture around as I settled in, but so far I've really been enjoying the work table as island.  I positioned it precisely so that I would have good view from the sewing machine out toward the woods in the backyard (rather than the underside of the deck that you see in some of these photos).   This position also gives me the best view of the design wall while I'm working.  I find that while I'm sewing on one piece I can be ruminating on the others.  It's just my personality to jump around between a bunch of projects.   The design wall that had been temporarily hung in the old house (thanks to hubby making a nice bracket on the back) is just leaning up against the wall here, the other work in progress is held up with masking tape.

A thrift store bulletin board gives me extra pin-up space. 
 I keep my main 24 x 36 cutting board right beside me so I can trim small stuff without getting up.  Or I can stand on the other side and transfer things back and forth to the design wall as I cut them.   The cabinet under the window was empty for a long time (What?! Too much storage?!?)  When I got bit by the dyeing bug, it very conveniently became storage for those supplies.  The larger cutting area on the other side of the machine has so far ended up to be more of a dumping ground for parts and pieces and projects in process.

This view looks over to the other side of the basement.
 I used magnetic clips to hang random stuff on the metal column.  It's right behind my chair, so I've since hung more useful things like my "stitch bible" showing all the embroidery stitches my machine can do.  (That was a great idea from a Craftsy class with Carol Ann Waugh).

New Styrofoam insulation for the permanent design wall. 
The design wall is seven feet high and fourteen feet wide.  I bought three sheets of 2" thick insulation and wrapped each with white flannel.  In the above photo two are wrapped, on the other you are seeing the reflective silver surface it comes with.  I wrap the flannel on this side, because I think the bright blue lettering on the other side might show through.  I read Lisa Call's great blog entry about her design wall construction.  She fastened all the foam pieces together then wrapped them and put them on the wall.  I decided to keep mine separate.  I really don't mind that there is a small seam in them, and it will make it easier to remove and change the fabric when I want to.

At this point it's starting to look lived in and used.  Piles of "stuff" are collecting.  Under the table I keep large flat things like poster board, sketch pads, remnants of old art work, wood dowels for hanging small quilts, and a collection of antique yardsticks for....  something someday.

I absolutely love the way the colors of the bead drawers match the colors in the Matisse print, so I park the cart there when it's not in use.  It also can roll over to the design wall to hold pin cushions and pieces of things I'm in the process of putting up.

At the far left, there is a poster tacked to the cabinet, it says "Peace to all who Enter Here."  I bought this when I was in high school - 1976 or so - and it was still hanging on my bedroom door when we cleaned out the family home after my mom's death in 2005.  I couldn't get rid of it, and this was the perfect spot - it faces the stairway as you come down into the studio.

Here is the final (at least for now) room!
 The design wall panels are held firmly in place by the wood trim, hubby has installed two sets of track lighting, and this is probably as neat is it ever was or will be!

Overall view
 In the background you can see that I've appropriated the space above the fireplace for more small quilts to be hung.
Dye "studio."
Speaking of appropriating, this multi-function table on the other side of the basement is the same size as my work table. It was perfect for spreading out bins when I was dying fabric.  Otherwise it's PlayDoh central for the grand kids, gift wrapping station at Christmas or overflow space for any other project that needs it.

In case anyone thought this was one of those "too neat to really use" sewing rooms, I just snapped a few more recent shots.  (Gosh this is a long post, sorry!)


Worktable and design wall in action.
I love having my books so handy, for how-to's or just inspiration.

I store my thread in old oatmeal containers.
It's not the most practical system,  but I love the graphics.  

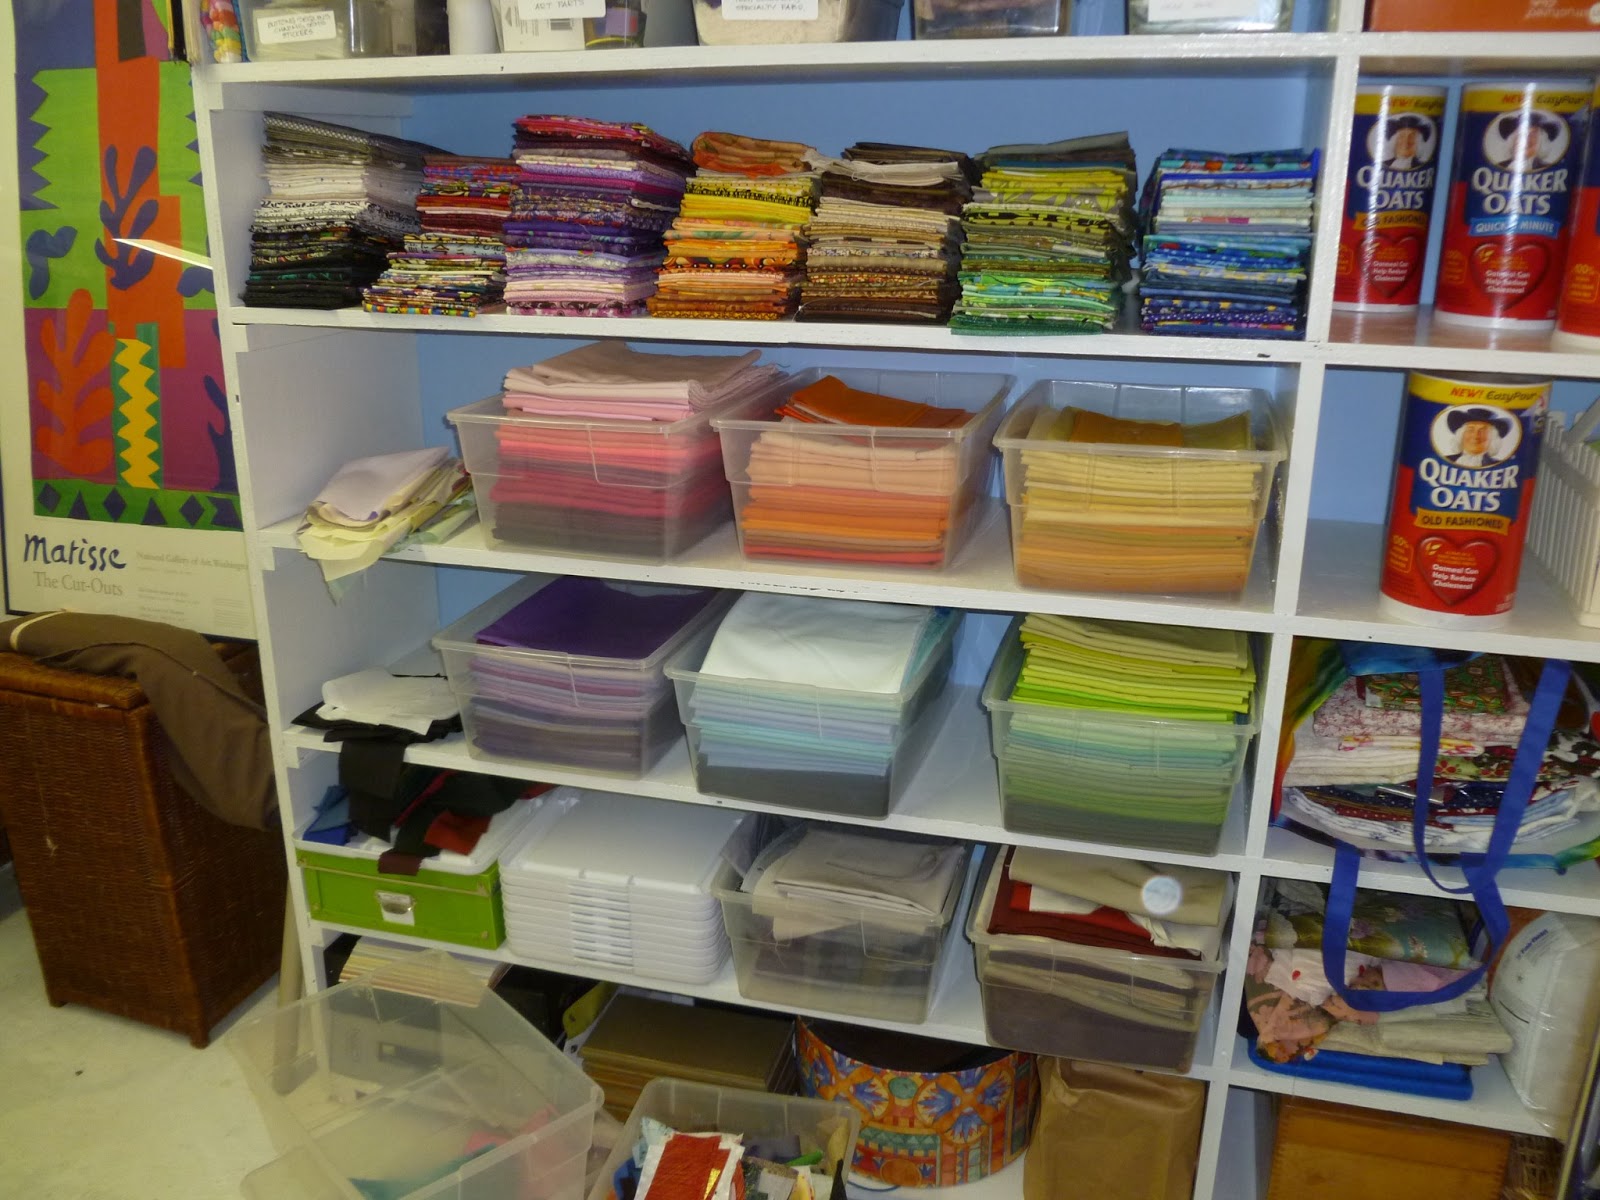
I don't really have a lot of fabric... (unless you ask my husband).
Right now I'm focused on using solids so that's what I've been buying.

These little shoe boxes are great for smaller WIP (UFOs).
 In the upper left you can see my annual ring binders. There is no computer in the studio, for a good reason.  So I print out tutorials or inspirations and keep them there, along with instructions from workshops, or any other random thing that is 8-1/2 x 11 and floating around.

Thanks for reading. I'm really glad to have visitors, so if you did stop by, leave a note and say Hi!


Wednesday, January 2, 2013

Studio Done!

My husband has spent a lot of time since Thanksgiving working on the studio, and it's officially done!  Here is a photo taken before the last piece of design wall was covered with fabric, but you can see the track lights and the h-u-g-e design wall space.  Yay!


I've cleaned things up and made more space for expanding my collection of solids.  Right now they are contained in four bins (fifth shelf down from the top) and I hope to double the space - if not the fabric so that the colors can be more spread out...

I'll post another photo of the finished room soon!

12-4-12:  Here's the Final Really Finished (and cleaned up)  Room!


Sunday, June 17, 2012

Finally!

The studio is finally more or less set up!  Here are a couple shots, first from the stairs, then looking back toward the stairs.  Since I last posted, I've put the big work table in the center, put together the drafting table, and propped up the design wall on some crates temporarily to make it easier to reach.  Eventually I'll fill the whole wall with design wall, but for now it's working.  


We did some browsing in a thrift store yesterday, and just happened to find the big cork board now hung beside the stairs. $15.00!  It's just about the right size for my original piece from the workshop.  I had put it aside because there was nowhere to stretch it out and sandwich it.  Now I think I will be able to do it on the concrete floor behind the cabinet.


AND last but not least I've made some good progress on "Filmstrip" as I'm calling it for now.  I connected the filmstrips to each of the orange blocks, then I started developing the second block according to the various versions I'd created.  I finally took a break because I can't quite decide if I want to make them asymmetrical, or two-part like the first four, or just make the purple strips wider.

THEN, I have to come up with the third block, of which there will be only two.  I don't have any solid idea at all but I am very much looking forward to allowing myself to improvise.  


Monday, June 11, 2012

It's looking like a real artist's studio... sort of

I apologize, if you were patiently awaiting progress photos of the studio.  I was focused on doing everything else first, but by Saturday the upstairs was basically livable.  However, the weather was so nice (i.e. not raining) that I couldn't resist doing a few things outside.  There is so much to do!  So many places ready to be landscaped.  So much black plastic to dispose of.  But not until I know I can control the weeds manually.

Then Sunday I headed toward the mess of boxes.  First thing in my way was my old drafting table, covered with roof granules and mouse refuse from 20 years in the attic.  Just cleaning it up led to completely refinishing it.  Which led to not getting much else done.  So after procrastinating for a week, I went down there at about 8:30 last night and powered through unloading everything into either the storage pieces or the shelves.  I didn't think too hard about what needed to go where, just get it out of boxes and into storage, THEN I can organize and rearrange to my hearts content.   I was amazed at what got done in about an hour. So sorry I didn't do a before picture of all the crap covering the floor.  Next I will reassemble the drafting table, and put a large worktable in the center of the rug.

I'm not totally sold on the idea of partitioning my space with the storage pieces, but not sure what else to do.  It's about ten feet from the window wall to the white column, and there's twenty more feet beyond that.  I would like my space to be open to the fireplace insert if I ever get one installed, but  I don't want to have to walk 20 feet to where things are stored, either.  Unless I get way more organized and  put everything in to the shelving unit.  I just love the way the colors of the Matisse are repeated in the bead storage drawers.  But I have to figure out how to hang it on the concrete wall.  The white unit was supposed to go there, but I'm liking this better.

Although the shelves look full, the pink/orange/green boxes are mostly empty and a couple shelves are occupied by my boxes and bags of family photos and a couple scrap-booking projects that have never materialized.  They can go elsewhere if needed, but I have a vague idea of doing some sort of collage art that would use them.  

The white board to the left of the cabinet is my old design wall, that seemed so BIG in the old house.  Now it's tiny.  Next step is to get that whole wall from the shelving to the window covered with foam and flannel.  Exciting!  It looks like the cabinet is to the left of the window, but it really isn't more than a couple inches over.   I'm also thinking the backs of the storage pieces can be turned into design walls too - a good way to step away from something,  and/or to hold smaller pieces when the big wall is full.
From the vantage point in this picture you see the underside of the deck and stairs but I don't look from this point - I'll post one showing the view out to the yard later.

Monday, May 21, 2012

Current Studio

Here are a few photos to show the current situation... or what was the current situation until last week.  Much of this stuff's already gone.  The photographer is slacking off.


Standing in the kitchen, looking left.  Note the second storage cabinet conveniently located over behind the bird cage.  There are other piles of "stuff" - fabric and supplies piles in the space leading to the living room, so that there is barely room to climb through.

Same vantage point - looking right.  the design wall is wonderful and very  useful, but it is also located in  most highly traveled path, from living room to kitchen... Anything not securely pinned can be knocked down, and occasionally falls into the dog food or water bowls.  And when I'm sewing my chair blocks the path, as well.

Transformation. Basement to Studio

I know I promised to document how an ugly basement is to become a fantastic studio, and I've been so busy packing and hauling boxes that I forget to take many pictures, but here's a little photo-essay of what I have photographed so far...

This lovely mess of plumbing has since been all closed in and painted white.  But I still harbor a secret plan to encrust it with "jewels" and other random found objects that I have already collected, and continuing to add miscellaneous stuff that I seem to pick up wherever I go.   It will be my "Memory Sewer Pipe." 

Close up of the lovely plywood shelving the previous owners kindly left for us.  I'm pretty sure they bought all their paint from the clearance/mistake shelf.  the yellow looks almost pretty in this shot, but believe me, reality was more like the above. 

The transformation begins.  Yes, it IS always him doing the work and me photographing.
Here is a blurry picture of the rug, retrieved from storage, and laid out temporarily. 

Everything that wasn't moving or brick was painted white. The shelves are nicely set up by dh for ME to paint.  The white floor is not quite what I was hoping for.  I envisioned a shiny gloss like you see in a muffler shop or something.


I do not know why Blogger won't let me insert photos at the END of my post, but it insists I want them at the top.  or at least somewhere other than the bottom.  Rather than fight I guess I'll start a second post to show my current studio/dining room for comparison.